Hi everyone. How is everyone doing today?
In my last post I made over an ugly vase. Here is it again.
This is what it use to look like.
I am going to show you how to do the little rosettes that I made to cover the vase.
I cut MANY, and I mean MANY.... strips of fabric about 7 inches by 2 inches. If you cut the fabric strips longer and wider, you will get a bigger rosette. You can experiment with any size strips to give you the size that you like.
Fold fabric in half.
With my left hand, (not really my hand, DIY hands, don't look like this.....lol my daughters lovely hands) fold
over and hold in place.
Continue folding over with your left hand in the same direction, and at the same time fold over with your right hand, making sure you hold secure with your left hand. This sounds a little confusing, but once you try it, it will make more sense. They are really easy to do.
Continue in the same way, until all the fabric is used.
At the end, you will need to secure with a needle and thread. wrapping around the stem, secure and cut thread.
As there are frayed edges, cut off any threads that are loose.
Cut the stem, so that your rosette can lay as flat as possible.
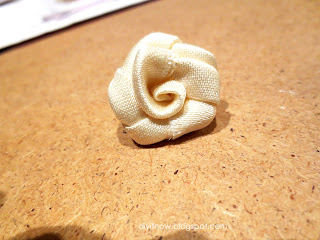
Pretty little rosette all done.
Someone in my house LOVES, Tiffany....lol My daughter decided to display all her Tiffany bags, and boxes on top of her dresser, with her very pretty lady jewellery holder, which was used as a centerpiece at a Tiffany inspired bridal shower. So pretty.
The decorative pomander ball on top was all handmade. I used a styrofoam ball, and created some round yo yo flowers.
These flowers are so very simple to make and look really nice.
Cut a piece of fabric approx. 6 inches by 4 inches.
Fold fabric in half and do a running stitch at the raw edges.
Pull to gather the fabric.
Bring together the edges of the strip of fabric and sew together; secure and cut off thread.
Turn over, and you are all done. In the center I added some silver sequins to cover the raw edge.
Here it is all done. These make very pretty decorative accessories. You can make many pomander balls and display them in a bowl too.
Her beautiful Tiffany jewellery.
I also made these little party favour pouches for the guests, and you can fill them with chocolates, or candy.
This is the ceiling at the venue. Very nice.
Added a little box underneath, wrapped in the same fabric, to give it some height.
DIYed this Tiffany inspired card box.
Fabric covered boxes stacked up on top of each other, with some ribbon and trim on the top box. A napkin ring shaped like a diamond ring was placed right on the top.
Lace umbrella.
Hope you enjoyed!
Linking this post to:
http://anightowlblog.com/2012/10/create-inspire-party-1026.html
http://tatertotsandjello.com/2012/10/weekend-wrap-up-party-and-liams-loft-giveaway.html
http://www.homemadeginger.com/2012/10/ginger-jamboree-link-party-1.html
http://www.houseontheway.com/
http://www.bystephanielynn.com/2012/10/the-sunday-showcase-party-no-123.html
http://homestoriesatoz.com/tutorials/tutorials-tips-link-party-82.html
http://todayscreativeblog.net/halloween-food/


Thank you! Those were some great tutorials and your flowers are beautiful!
ReplyDeleteThanks Danni. So easy to make, and very budget friendly.
ReplyDeleteHugs
Such pretty embellishments. Your very talented. Newest follower here. Found you through Creative Bloggers Party and Hop.
ReplyDeleteWow, such pretty and fun ideas!
ReplyDeleteI would LOVE for you to link this up at my Ginger Jamboree Link Party!!
The Tiffany set is beautiful and the pomander you created is icing on the cake ♥ Thanks for stopping at my blog it's nice to find your blog and the clever and pretty diys. See you again!
ReplyDeleteI absolutely love this! My daughter is getting married next summer - I have to try my hand at this definitely!
ReplyDelete( I'm a furniture DIY'er not so crafty - but I think even I could do this lol )
Thanks so much for sharing - your newest follower - would love to have you come by for a visit and follow back when you have the time!
( Oh and I painted a dining room set in Tiffany blue - so love that color!!! )
Hugs,
Suzan
Thanks so much for commenting. I am certain that you can do it for your daughters' wedding. Best of luck.
DeleteSo glad to find you. I am your newest follower too.
Thanks for sharing, great tutorial, can't wait to try these out!
ReplyDeleteOh, and I'm your newest follower :)